Grandma's fried yellow squash

Seriously, this is one of my all time favorite summer side dishes. I learned to make this at a very young age, helping my grandmother in the kitchen. Like my grandma, I tend to just throw stuff in and hope it works out. I very rarely measure things while I am cooking so I will do the best I can to guestimate these measurements. This dish has also become a family favorite, and summer tradition. We garden here, and usually try and grow our own squash. This summer was exceptionally hot and my squash plants didn’t make it. Thank the gods for farmers markets! This time around, as I was making this tutorial, my niece was over and she got to learn the process as well. I hope to continue to pass this easy recipe down the family line. Because, well, it’s just that good.

Grandmas fried yellow squaash

There are very few things you need to make this easy side dish, most of which you likely already have on hand. So here is my Grandma’s fried yellow squash recipe. Let me know if you make it and how it turned out!

Ingredients:
1 cup of Yellow corn meal
1/2 cup All purpose flour
2 tsp Salt
few dashes of Pepper
2 Eggs
3-4 tablespoons Olive or Vegetable oil
4 tbsp Unsalted butter

beat eggs

Step 1: Beat those eggs in a bowl like you mean it.
Step 2: Slice up your squash like you really mean it.

add sliced squash to egg

Step 3: Add your sliced squash to your egg mixture, making sure each slice has a nice little egg bath and set aside. (You can do that one like you just don’t care.)

pour yellow corn meal in bowl

Step 4: Combine your dry ingredients well in a separate bowl, and smile for the camera.

add flour, salt, and pepper to corn meal

coat wgg covered squash with dry mixture

Step 5: Heat your skillet and add your oil. I used olive oil this time, but I normally like to use vegetable oil because it doesn’t burn as quickly as olive oil does. If your olive oil gets to toasty, it effects the flavor. Not that anyone would complain, but when it happens to me, its hard not to finish my meal without some serious stink eye at the plate. (Hashtag megafoodsnob)

add butter cover and brown

Step 6: Add your butter to the top of your squash and cover, checking every few minutes. As it starts to brown you’ll turn it carefully. I say carefully because my flipping skills are somewhat over aggressive causing squash to fly all over the kitchen…. Notice that I did this outside? That’s preventative measures in action. Also, sometimes it does get smoky from the olive oil.

Grandma's fried yellow squash is a perfect summer side dish

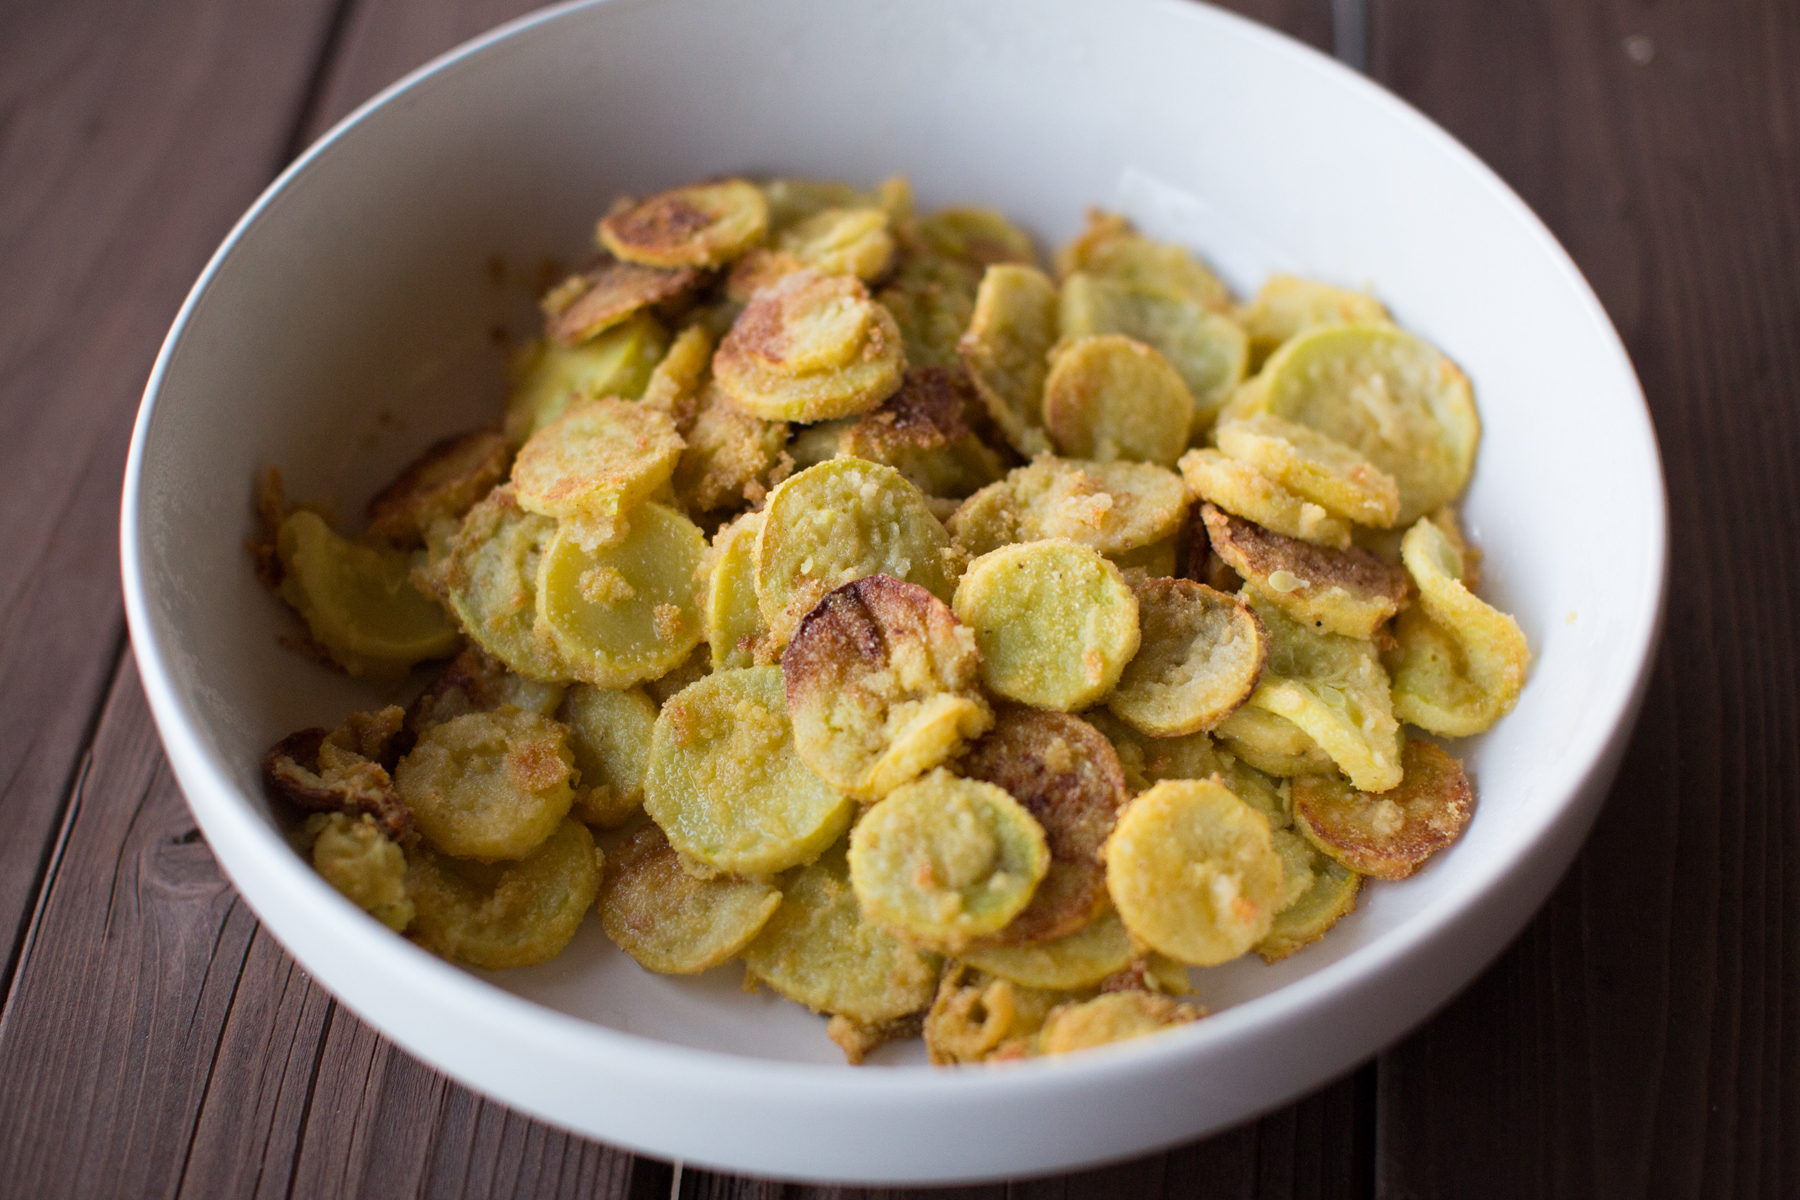
Serve right away, I usually add a tad more salt, basically to offset how genuinely sweet I already am… Just kidding, my family loves salt. (Hashtag goiterfreefamily)

Like I mentioned earlier, this is a recipe I got from my grams as a young girl. Some things she did wildly different than me. She used a paper grocery bag to mix her dry ingredients, then it always got nice and sloppy when she added the squash covered in egg. She would shake it violently and masterfully because each squash came out perfectly coated. She also used what seemed like a pound of butter. I tried that method early on in my marriage and the bag busted, and well, I never tried that again.

Hope you enjoyed this recipe and picture tutorial! If you have a similar recipe leave it in the comments! Or if you give this a try let me know what you think!

Photo Credit: Braden Hansen & Jill Hansen

DIY Salted Caramel Creamer

This is a super simple DIY creamer. I found this on pinterest not to long ago, and have now decided we never need to buy coffee creamers again! Here is the recipe for my DIY Salted Caramel Creamer.

Let’s get started…
Ingredients:
1 – 14 ounce can of sweetened condensed milk
1 Cup of half and half
3/4 Cup of whole milk
3 tbsp. of caramel sauce
1/2 tsp of sea salt

Ingredients for caramel creamer

Step 1: Combine all ingredients into a mixing bowl.
Step 2: Mix well

Simple DIY caramel creamer

Annnnnd, basically that’s it. See, I told you it was easy!

You really want to be sure you get the caramel mixed in as well as possible. Otherwise it will sink to the bottom. You can of course shake it before you pour it into your coffee. Also, you don’t have to use whole milk. That’s just what we always have. And if you are dairy free, just substitute the milks for whatever you choose. Almond milk is a great substitute, or soy milk, or even rice milk.

Easy DIY Caramel Creamer

For a easy DIY Vanilla creamer, use 2 tsp of vanilla extract in place of the caramel and salt. I hope you enjoy!

Kid friendly tuna rolls

So I’m over here all, “This year, I’m upping the school lunch game.” and I’ve got the kids all on board. But let me first state that having tons of kids has a few advantages, like slavery, child labor and any other hard work intensive purposes that come up. In my case, they help me prep fun kid friendly foods ahead of time, and the older kids pack their own lunches. A few of my boys love tuna. Personally, I hate it, and may or may not gag repeatedly when working with it. That being said, let’s get started with this kid friendly tuna rolls recipe.

Easy Tuna Rolls Ingredients

Ingredients:
2 – 12 oz tuna in can
1/3 c. mayo (not pictured)
1/4 c. pickle relish
2 hard boiled eggs
2 tsps. of wasabi sauce
seaweed sheets
1 1/2 c. of cooked sushi rice

Step 1: Start by cooking your sushi rice per package directions. Sushi rice cooks a little differently than regular rice. Combine 1 1/2 cups of sushi rice into a sauce pan with 2 cups of water. Bring to a boil, reduce heat to low and simmer for 20 minutes. Then remove from heat and let cool.

Combine all Tuna rolls ingredients

Step 2: Combine drained tuna, mayo, relish, egg yolks, and wasabi sauce. Leave the whites out and set aside. If you find that your mixture is still too dry add a small amount of mayo.

add chopped egg whites

Step 3: Chop your egg whites and add to mixture.

Spread sushi rice on seaweed

Step 4: Place a sheet of seaweed on a bamboo mat. (If you don’t have a bamboo mat, I would suggest using a placemat that is somewhat firm. Then use parchment or wax paper over the top of that.) Spread sushi rice on top of your seaweed. Your seaweed should be shiny side down. Leave about an inch at the end, because when you start to roll it the rice spreads out a bit.

Step 5: Add a thin layer of your tuna mixture to the center of your rice.

Use bamboo mat to roll sushi

Step 6: Place seaweed close to the end of your bamboo sheet and begin to roll. I hope the pictures help.

Step 7: Slice your tuna rolls to your desired thickness! And tada! Easy as pie.

Slice rolls

Serve your rolls with wasabi sauce and some pickled ginger. Want to know what is really great these days? The fact that you can find these ingredients in your regular supermarket! I used to always have to drive to my closest Asian market for things like seaweed and specialty rice’s. And that was a 45 minute drive.

My intention wasn’t to serve this delicacy for dinner, it was for my kids to take in their lunches. So to spice things up a bit and make it a little more fun, I found these googly eyes and mustaches in the baking section at the store.

kid friendly toppings

Here is a sample of our cool bento box lunches! I hope to share a few other quick and easy plan ahead school lunches.

Tuna Roll bento box

***If anyone is interested in a seaweed-free/tuna-free version please let me know. My daughter made some that way and I’m sure she’d be happy to share the recipe with you non-seafoodies like her and I.

Soft Garlic Pretzel Recipe

Garlic Soft Pretzels

Before you go forward, I am warning you now, this step by step soft garlic pretzel recipe has a lot of photos. Because making pretzels is way harder than I had ever imagined it would be! But in the end it was worth it and we had a lot of fun in the process. We tried to follow along to this recipe we found on Pinterest. And for those of you that aren’t serving a family of 6-8 people, you might want to cut this recipe in half. This recipe will yield 16 small-medium pretzels.

Ingreditents for garlic soft pretzels

Ingredients you’ll need:

For the dough
3 cups warm water (110-115° F)
2 tbsp. sugar
4 tsp. garlic salt
4.5 tsp. instant yeast
9 cups all-purpose flour
4 tbsp. unsalted butter, melted
Vegetable oil, for greasing the bowl
Large dose of patience

For finishing

Cooking spray
20 cups water
1-1/3 cup baking soda
2 egg yolk beaten with 1 tbsp. water
Garlic Salt salt
8 tbsp. melted butter

my boys

Here’s my crew reading through a few recipes to find just the right one.

starting the dough

For the dough, mix together sugar, water, garlic salt, and yeast with a hand mixer on low speed until all of your yeast has dissolved. I ran out of my small jar of yeast, and I started to panic. Then I remembered I’m a rockstar and buy odd things in insane bulk. Like yeast, why in the world do I have this amount of yeast? Um, I was worried about 12-21-12. Yep, I thought there was a chance the world may come to an end and buy lots and lots of yeast seemed like the right thing to do. There, I said it. Not my proudest purchase, but it came in handy today. And if any of my neighbors ever need some yeast, I got their back, for at least the next decade.

use plenty of flour
don't loose track of flour

Add your 9 cups of flour and try not to lose count. Do not pack your flour, scoop it lightly and do not exceed the top line of your measuring cup. This will help keep your dough light and fluffy as is bakes.

add some butter

Add your 4 tablespoons of melted butter. And begin to mix. I do not have a machine mixer so this particular step was long and tedious. Once I felt I had it mixed pretty well, I removed it from the bowl and kneaded it by hand on my counter top. (And its quite possible my pretzels may have had some subtle hues of jelly or ramen noodles based on that last minute audible.)

knead the dough
let dough rise

One you have it kneaded as smooth as possible, roll it into a ball and place it in a large bowl that is lightly greased with vegetable oil. Rub a bit of oil over your dough ball as well. Cover your dough with plastic wrap and let rise for an hour.

line trays with parchment paper

Line your baking sheets with parchment paper and lightly dust them with cooking spray.

seperate into dough balls

Once your dough has risen, separate your dough into 16 equal size dough balls. This part was kind of hard when you have 4 little boys grabbing handfuls. This is where you turn to your large dose of patience. Save some for later as well.

boil water with baking soda

This step seemed odd to me, but I did it and that’s that. Bring your 20 cups of water and 1-1/3 baking soda to a boil.

12

have fun with dough
form pretzel shape

This next portion of pretzel making took a heck of a lot longer than I thought it would. Actually it probably took us about an hour to get our pretzels just right. Reason being was little hands have a harder time getting the dough rolled out into long strands. Ideally try and get your strands to at least 24 inches. I’d say we averaged about 20-22. So some of our pretzels we super fat. Still equally scrumptious, just thick.

pretzels are always perfect

I really loved seeing the wonky pretzels my kiddos formed. To me they were the true pretzel perfection.

16

The boys had such a hard time getting their dough in strands, at one point my oldest son just started swinging his around, which kind of worked as it stretched out a bit. But I do not recommend this method. If you get a little too wild with your swing, your dough will break in half. And then, game over. Gotta start again. And mom has to then consume another large dose of patience. But its ok to laugh, just don’t belly laugh because that could be easily confused with shenanigan encouragement.

boil pretzels before baking

Here’s what the water and baking soda is for… you boil your pretzels for about 30 seconds each and place them back on your baking sheets. They sort of expanded but not by much.

add garlic salt

Take the two beaten egg yolks and brush over your boiled pretzels and add some garlic salt.

bake at 450 for 10 minutes

Bake your pretzels at 450 degrees for 10-12 minutes. We baked them for 10 minutes.

tasty garlic pretzels

And TADA!! Perfectly tasty soft garlic pretzels!

Soft garlic pretzels

With your remaining 8 tablespoons for butter, melt that down and add a few dashes of garlic salt for dipping! Of course you could also use cheese sauce, ranch, or something else you might like.

22

23

24

25

26

Parmesan Chicken Recipe‎

Chicken Parmesan Recipe

This is one of our all time favorites. Its simple and always a hit. My parmesan chicken recipe can be used to make chicken tenders as well as breaded eggplant or eggplant parmesan.

Chicken Parmesan Ingreditents

Ingredients for chicken:
Chicken Breast 1.5-2lbs defrosted
1/2 cup parmesan Cheese
1 cup of Italian bread crumbs
3 tbsps of extra virgin olive oil
1 egg

Cut chicken breast in half

Because I try and create budget friendly meals to feed my army, I tend to cut my chicken breast in half by width. I started doing this to eliminate food waste in my home. My younger kids have a hard time eating an entire piece, and it cooks much faster this way. I call that a double win! If you prefer to have a larger piece of meat, you can always pound your meat out to keep the time down. I also trim any excess fat.

Cut all your pieces and set aside to make your breading.

Bread crumbs, parmesan and one egg

For this recipe I used one cup of Italian bread crumbs and 1/2 cup of parmesan cheese. You’ll need two separate bowls, one medium sized bowl for the breading and one small bowl for one egg.

bread crumbs, parm, salt and pepper

Combine your bread crumbs and cheese.

add salt and pepper and mix

Add salt and pepper to taste. I didn’t measure that part. Sorry folks.

Be sure to mash up all those cheese clumps that sneak their way into your breading. Mix it well so you keep that delicious flavor even to the taste buds. They’ll thank you periodically throughout your meal. Trust me. (wink and a handgun)

wisk egg and coat your chicken

Wisk your egg in the small bowl and give your pieces of chicken a well deserved egg wash. I feel like this could be the start of a cooking joke. What do you call a chicken who bathes in their own beaten egg…. And for anyone that comes up with an awesome punch line, I will reward you with a gift card to starbucks. Or a dozen fresh eggs, your pick.

add oil to sautee

Heat your olive oil on medium, be sure you have all the former steps ready. If you over heat your oil, you’ll ruin the flavor. AND you’ll smoke up your kitchen. I have only heard of these things. Its not like its happened to me or anything.

10

Turn when dark golden brown

Add your chicken to your heated oil and brown on both sides. I like mine to get a dark golden brown. Because once it starts to bake, it will seal in the juices and add some crisp. Once you get your chicken browning you can start in on your marinara.

Marinara sauce ingredients

Ingredients for Marinara sauce:
One 15 oz can of tomato sauce
One 6 oz can of tomato paste
Garlic power
Italian seasoning
Seasoned salt
Paprika

Ok so this recipe here is the exact same thing I use for my pizza sauce, and dipping sauce for cheese sticks, and basically any other time I need marinara. However it is not my spaghetti sauce recipe. That is just a little different.

making marinara

Combine sauce and paste into a bowl. I didn’t measure the seasoning either but I’m going to give you some guesstimates. Roughly a 1/4 tsp of both garlic powder and seasoned salt. 1/2 tsp of Italian seasoning, and about an 1/8 tsp of paprika. Mix well. The reason I use the paste for this dish is because it keeps the breading from getting soggy when its baking. I use the entire can of paste. This is just what I’ve come up with over the years and found to work best on both chicken and eggplant parmesan. You can always be a sell out and just buy a can of marinara, but where’s the fun in that?!

add marinara to breaded chicken

Add a little of your sauce to each piece of chicken and top with shredded mozzarella cheese.

bake chicken parmesan for 15 minutes

Bake at 400 degrees for about 15 minutes.

bake chicken parmesan for 15 minutes at 400

And there you have it! Mouth watering chicken parmesan. I would say the prep time for this was about 20 minutes. That includes the breading, browning, and the marinara. So you’re looking a 30-45 minute meal here. It took me a tad longer tonight because my camera man was running into some focusing issues. (My 10 year old son).

chicken parmesan made simple

If you try this recipe out, please let me know how it went! Also, if you come up with a killer punch line to my lame cooking joke… I am a woman of my word and will honor your reward!

Pot Roast Perfection

“Do I smell a  pot roast???” Any one seen Diary of a wimpy kid? Well this is a line off the movie, one that I hear anytime I am making a Pot Roast, Said by Brady.

A tried and true family favorite. And honestly one that is thoughtless and time saving. I have to admit, I don’t care for a lot of red meat. But if, and when I do decide to put it on the table for dinner… it’s often in the form of a roast. I have tried to make roast in many different ways. And of course, just as the coined phrase goes, “if it ain’t broke, don’t fix it”. This is the way I was taught to make a roast when I was a teen. It’s simple, tasty, and takes little time and attention.

Ingrediants to the perfect pot roast

Here’s what you’ll need:
A nice chuck or rump roast (Thawed)
Extra virgin olive oil
Garlic Powder
Seasoned Salt
Black Pepper
Head of garlic
A few large carrots
A large sautéing pan
A large crock pot
Some beef stock

(These ingredients are major staples in my cooking: garlic powder, seasoned salt.)

So to get started add a few tablespoons of olive oil to your sauté pan and heat on medium high. Season the roast generously with the garlic powder and seasoned salt, and lightly dash some pepper. Be sure you do this to both sides of the roast and the edges. Add to your oil and brown both sides and all the edges. Browning is the key to a tastier, juicier, and all around better roast.

browning the pot roast

After you have given your roast a nice crusty brown layer, transfer to your crock pot and set aside. Chop up your carrots into bite size pieces, and separate your garlic cloves. I use the entire head of garlic. Using the remaining oil and season from browning your roast, toss in your carrots and garlic and sauté them until they are a nice golden color.

add carrots and garlic to the pot raost

Once you are done with the carrots and garlic, pour them over your roast. I like to pour the remaining oil over the roast too, waste not want not!

Perfect Pot Roast

I add two beef bouillon cubes and a cup of water to my crock pot and set in high temp. You could also just add a cup or two of beef stock. I usually cook on high for 5-7 hours. So I put my roast on in the mid morning.

A good rule of thumb is an hour for every pound of meat. The longer and slower, the better the meat is to fall right off the roast. And that my friends, is a perfect pot roast.

Perfect Pot Roast everytime

Some of my favorite sides to this delicious roast include, but are not limited too: potatoes, corn on the cob, cauliflower mash, and salad.

This Roast was served over my cheesy garlic and herb cauliflower mash. Pot Roast Perfection, always mouth watering goodness. Hope you enjoy, if you have a pot roast recipe you love please share in the comments!

Hamless Monte Cristo

I am sure you moms out there can agree that there are a few questions we hear on the daily that we could definitely do with out. Like “what’s for dinner”. I hear this question anywhere from 3-6 times per day. Everyday. 365 days a year. I guess that’s what I get for having a large family. And since I am feeding what feels like a small army, I have to figure out how to make something delicious in a reasonable amount of time. No one wants to live in the kitchen. My family is totally spoiled when it comes to dinner. They are used to variety and multiple side dishes. So if I’m feeling lazy and make what I call a “one hit wonder” (a dish with veggies, meat, and whatever else) they immediately say, “is this all we are having??”. Then I have to try and contain my exaggerated sighs and eye rolling and politely respond with a “yes” rather than a “ANYONE ELSE WANT TO VOLUNTEER AND COOK FOR YOU ALL!!??” (But maybe sometimes I respond that way.)

Ingredients

So while my husband and I were grocery shopping yesterday he asked if I had plans for dinner. I said, “no not yet” because we were pretty food less before our trip. I usually plan out a few weeks of meals then make a list. But I didn’t do that yesterday. I’m not sure why, I made a list and was mentally deciding what we would have this week. So as my husband was asking, he was holding some dinner rolls. He said, “maybe we could do something with these?”. I stood there a minute thinking, “what the heck, who plans a meal around dinner rolls?!?”. Then sandwiches popped in my head, knowing that I had an abundance of farm fresh eggs I needed to use, Monte Cristo’s seemed to be the perfect option. My husband said he’s never even heard of them, but agreed they sounded good. I can’t just make the sandwich with cheese and ham. First off, I don’t eat pork, secondly… that’s just too boring for me.

When we got home the first thing that was asked was, “what’s for dinner”. And of course the kids had never heard of monte cristo’s either. We did some traditional ones and then we had some fun making other gourmet sandwiches. No one had the same sandwich last night. For my sandwich, I wanted to use portabella caps, swiss cheese, avocado, and turkey bacon. So here’s my hamless Monte Cristo recipe.

Chop portabello caps

I started by chopping and sautéing my mushroom caps in a little extra virgin olive oil.

3

I seasoned the mushrooms with ground garlic, parsley flakes, and a little salt and pepper. The mushrooms tend to absorb the oil so add more oil if you need to. Just be careful not to make it too oily, unless that’s your thing, oily greasy foods.

garlic spread ingredients

I made my own version of a garlic spread. I didn’t measure anything, just threw stuff in a bowl and mixed it up. I make this a lot, and use it for veggie dip as well as a spread. Pretty simple spread, sprinkle garlic powder and dill into a bowl of mayo (I prefer the whip dressing) and add a little mustard to taste.

add garlic spread and cheese

I used my spread on both sides of my bread to make it extra creamy once the cheese was melted. I added three slices of swiss cheese. One on both sides and then one in the middle of all my sandwich guts. I tore them so they weren’t hanging over. Cheese that hangs over gets sacrificed to the griddle Gods. And that’s just wasteful in my opinion.

add everything but the kitchen sink

I tried to layer my ingredients so the melted cheese would hold everything together. What’s not pictured is the beaten eggs. Before your sandwich goes to the griddle, dip both sides of the sandwich in some beaten eggs. Add a little butter to your griddle so the bread doesn’t stick.

complete sandwich on griddle

Press sandwich to make sure all that cheese melts all over. Other versions of a monte cristo made last night included: cheddar jack cheese bread, peppered bacon, and turkey and cheese. There were no two sandwiches alike.

Wild Rice with Butternut Squash and Kale

This is what I made for Thanksgiving dinner. I know it’s a little late to be posting but it was pretty good. Especially considering it was my plan B. When I went to the store to buy a fresh beet they were out. It was originally going to have butternut squash and beets. I then subbed the beets for kale and only added the red cabbage for color. It was a great fall dish. Hope you at least give it a try!
And I wish I would have taken the time to take a better plated picture, but we were starving so as soon as we unveiled all the amazing food, we got down to business!

Ingredients for Wild Rice and butternut squash

Ingredients for Wild rice with butternut squash and kale:
2 cups chopped butternut squash
1 cup of shredded red cabbage
1 cup of shredded kale
2 parsnips chopped
1 1/2 cups of wild rice
Half an orange

Parsnips

chopped kale

I used a bag of already chopped kale, which was super easy.

wild rice

I cooked the rice separately in chicken stock according to package directions.

Add butternut squash and sautee

Start by sautéing your butternut squash in a little olive oil first, just enough to make them slightly tender, but not squishy, then add in your parsnips, they will also need to soften some. I admit, I used too much oil, but it was fine in the end. Kept the rice from clumping up.

Add chopped red cabbage

Then add in your chopped red cabbage once the squash and parsnips are to your desired tenderness.

Add Kale and orange juice

Then add in your chopped kale, and once you’ve gotten a good sauté going, take half an orange and squeeze it over the veggies. Then toss with your cooked rice. Salt and pepper to taste. This was pretty simple to make, and if you wanted to make it even faster you can buy everything already chopped at the store.

Wild rice with butternutsquash

Sweet treats for everyone. PB Protein Balls

Peanut Butter Protein Balls. So this was my first time making these yummy little treats and I wasn’t quite sure if the kids were going to like them. Geez, I wasn’t even sure that I was going to like them. When we made these, we made two versions. One was slightly more kid friendly than the other. Making the other a little healthier. A mommy version if you will. Cody (the beautiful hand model in all my food posts) has made these before. We found that we do much better when we aren’t measuring things. Does that ever happen to you? As soon as you start following a recipe, all of the sudden it tastes very different from what you are used too? This was the case in making these PB delights.

PB Protien balls ingrediants

The Ingredients you will need for these PB Protein Balls:

  • Oats
  • Peanut Butter (Can be creamy or crunchy)
  • PB2 Powder
  • Protein Powder of your choice (vanilla or chocolate)
  • Honey
  • Agave Nectar
  • Chocolate (optional)
  • Sprinkles (optional)

You will also need a mixing bowl, spatula, & measuring cups and spoons.

For the kid friendly PB Protein Balls mix all together 1 C. Oats, 1 C. PB, 1 scoop of protein powder, 1/4 C. honey. We used vanilla whey protein powder. Added some fun sprinkles and 2 squares of chopped semi sweet chocolate.

For the healthy mommy version we used PB2 powder to make 1 cup of peanut butter, then added 1/4 of Agave nectar, 1 C. oats, and added two scoops of chocolate soy protein powder.

We found these to be quite sticky, you can use any type of flour to make them less sticky. Once you mix it, roll them into balls and place them on parchment paper. Refrigerate for about 15 minutes. Keep them in the fridge. They were a big hit with my kids. And a quick way to enjoy some extra protein for me. Hope you all enjoy!

PB2 Powder

Oats and Sprinkles

PB Protien Balls

Snack time…

This no carb diet plan hasn’t been near as hard as I imagined. I credit that to the fact that I love veggies and snack time. Now I just need to incorporate a more regular exercise regiment. Something I am not so eager to do. I plan to share some of my healthy recipes and meal planning on the blog! But today’s tasty little treat was fast and delicious. Although, I’m not sure that the meatballs are as healthy as I should be eating. But it was protein and I can only eat so many eggs a day.

Sautee your meatballs in a small amount of extra virgin olive oil. When browned and cooked in the middle add some chopped fresh kale. Snack time never tasted so good, and healthy!
M69A7632

M69A7629